Since last month, Ubuntu has released its latest LTS version, Ubuntu 18.04 LTS. This version has long support from Ubuntu so you can optimally use it until 2023. By installing Ubuntu 18.04 LTS, you will get enhanced security, accept GNOME as your desktop environment, be entitled to new icon collections, get colored emoji, get Linux Kernel new features, and much more.
This latest version offers so many benefits that you might never have imagined. But how can you do to install it to your PC? Just keep reading on…

This short article will guide you on how to install Ubuntu 18.04 LTS. Please Note that this guide is based on LTS branch that is regularly updated every five years. The LTS branch is highly recommended for use on servers. In performing this installation process.
Requirements:
– Fast Internet connection
– Ubuntu 18.04 server CD that you can get by clicking Here. This link is recommended for 64Bit Intel and AMD CPU users. Anyhow you can use this link: http://releases.ubuntu.com/18.04/.
– Server as per your requirement complete with IP address and gateway of course.
– CD / DVD of Ubuntu installation
– If you, for some reason, have to install the OS using a virtual machine, you are required to have the ISO file as the source for your CD / DVD drive. Use VMWare and Virtualbox if you do not want to go through the burning process on CD.
Stages in installation:
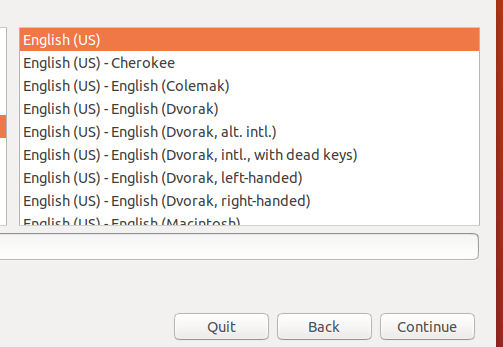
The first time you will see a screen display that includes a choice of language. Choose the language you are in, so you will be more helpful in running the process.
You will see the option ‘Install Ubuntu Server’. Click on that option and you will start the installation process.
You will once again find the language selection option but different from the first, this option is for Ubuntu OS (which will be installed).
The next step is to choose your location. In fact, there are many amateurs underestimate the selection of locations whereas this selection is very important to set the keyboard layout, server’s time zone and local of your server. Again, this step includes area selection, country selection and local of server selection.
Set the keyboard layout. The keyboard layout settings can be done in two ways; manually or automatically run by the installer. If you are not a very detailed person, you can choose ‘yes’ and let the installer detect your keyboard layout automatically.
Next, the installer will check the installation CD and also your hard disk capacity. This check will be followed by a network configuration with DHCP if the system finds a DHCP server on the network.
After the configuration process is complete, you must enter your hostname. Note that you are not allowed to log in as a root user (directly).
You may need to create a new system user. Avoid the name ‘Admin’ because the name is a reversed name in the Ubuntu system.
Choose your password. Make sure it contains a mix of letters, numbers and punctuation. Don’t forget to make sure your time zone is detected by the installer appropriately.
Perform partition on your hard disk. Run: Guided-use entire disk-set up LVM. This step will give you one volume group with two logical volumes. However, the partition procedure can be customized to your liking. If you feel quite capable, you can do it manually.
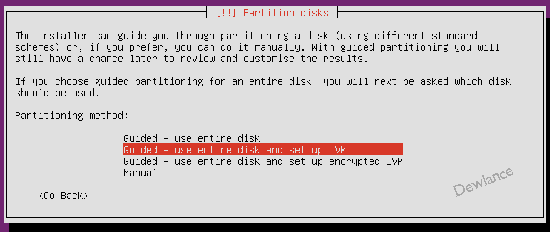
The next step is to select the disk where you want the partitioning process done. You will see a confirmation query. Choose ‘Yes‘. By running ‘Guided-use entire disk-set up LVM‘ then you will create a large volume consisting of more than one disk.
When the partition process is complete you will be asked if you will write changes on the disk. Answer ‘Yes‘. Base system will be installed immediately. This process may take several minutes depending on your computer specifications.
Once the base system has been installed, it is time to configure the ‘apt‘ package. If you are not using an online proxy server, you are advised to leave the HTTP proxy line empty. For a novice user, server update is highly recommended.
After server update is complete, you can choose the basic package for your Ubuntu server. When you’re asked ‘Install GRUB boot loader to master boot record?’
You need to select ‘Yes‘. This installation is the final step before the installation of the base system is complete.
The next step is to remove the installation CD from your computer. Press ‘Continue’ to start the reboot process. After the reboot is complete, Ubuntu 18.04 is installed perfectly and ready to use.
Hopefully this article can be useful for you.
You can get Linux VPS from https://dewlance.com/cheap-xenpv-vps – Ready to use withing 180 seconds.
No responses yet