Apache is a cross-platform, open source HTTP web server that implements the HTTP / 1.12 protocol and the notion of a virtual site. The objective of this project is to provide a secure, efficient and extensible server that provides HTTP services in synchronization with current HTTP standards. The Apache web server is often used in combination with the MySQL database engine, the PHP scripting language, and other popular scripting languages such as Python and Perl.

What you need to know about this configuration is that it is called LAMP (Linux, Apache, MySQL and Perl / Python / PHP) and the most important, it forms a powerful and robust platform for the development and distribution of web-based applications.
Apache installation process
Due to the great popularity of the application it can be found within the repositories of most Linux distributions, so its installation is quite simple. In the case of Ubuntu 18.04 both desktop and server will support the package that is within the repositories.
We just have to open a terminal and execute the following command:
sudo apt update
sudo apt install apache2
We just have to confirm the installation and all the necessary packages for the functioning of Apache on our computer will be installed. Once the process is finished, we only have to verify that it was installed correctly, for this we execute:
sudo systemctl status apache2
Where we should receive a response similar to this one:
Loaded: loaded (/lib/systemd/system/apache2.service; enabled; vendor preset: enabled)
With this we can see that the service was installed and is running correctly. But we also have another method to verify this. The other method is by requesting an Apache page, for this we only have to enter our ip address in our browser. If you do not know the IP address of your computer, you can obtain it in different ways from the command line.
We just have to execute this command:
hostname -I
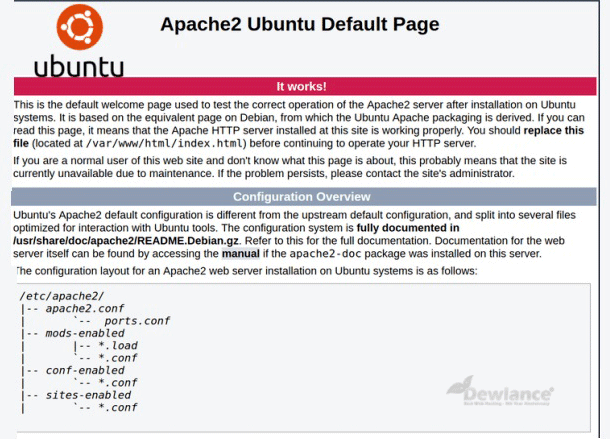
When doing so, we can identify our IP address when the browser displays the following:
apache_default

This is the page of Apache that shows us that it is running on our computer and shows us the directory where it has some configuration files.
Basic Apache commands
If we have the Apache web server running in our system, it is necessary to know some basic commands of this, because with this we can start or stop the process if necessary.
The two most basic commands are to start and stop the service on our computer. For this we only have to run on the terminal when we want to start Apache:
sudo systemctl start apache2
While to stop Apache we execute:
sudo systemctl stop apache2
We also have the possibility of restarting the service without stopping it, for this we only execute:
sudo systemctl restart apache2
When it is in operation and we need a refresh of the process, we can execute this command which will not disconnect the existing connections with the server:
sudo systemctl reload apache2
In case of wanting to disable the service, we only execute:
sudo systemctl disable apache2
And for the opposite case in case of re-enabling the service in our team, we only execute:
sudo systemctl enable apache2
Apache2 modules
Apache2 is a server that can be complemented with modules. Extended features are available through modules that can be loaded in Apache2. By default, a set of modules is included in the server at the time of compiling it. Ubuntu compiles Apache2 to allow dynamic loading of modules. Configuration directives can conditionally include the presence of a module by including them in a block.
You can install more Apache2 modules and use them on your web server. For example, run the following command in a console to install the MySQL Authentication module:
sudo apt install libapache2-mod-auth-mysql
In the /etc/apache2/mods-available directory you can verify the additional modules.
Hope this article will help you understand how to configure Apache Virtual Host inside Ubuntu 18.04.

No responses yet